Salesforce CPQ refers to Configure Price Quote; it helps your sales teams generate quotes more quickly than ever. But prior to diving deeper into Salesforce CPQ, let’s first look at the conventional sales process followed in any organisation.
Table of Contents
Traditional sales process
Steps for proposal and quotation
- Lead generation
- Prospecting & Qualification
- Presentation & Proposal
- Negotiation
- Closing deal

Sales representatives need to figure out products and services based on the requirements of the customer and then configure and customize them as per the client. Experts must review the pricing documentation or spreadsheets to find the product’s basic price or list price. The next step is to determine which discounts the client is eligible for and manually apply discounts, hoping not to make any errors. There may be a review period for particularly large discounts. Once everything is approved, the sales reps can now begin to create the actual quote document that can be sent to customers. This process is very complex and can consume a lot of time and manpower.
So to increase efficiency and make this process of proposal and quotation easy and quick, Steelbrick developed a software solution on top of the Salesforce platform called Steelbrick CPQ, which was later acquired by Salesforce and called Salesforce CPQ.
What is Salesforce CPQ?
It is software developed on top of the Salesforce platform, which simplifies the process of quote generation. lets understand the CPQ in more depth:
- Configure: Configuring the right products and services according to customer requirements. It guides the sales reps to select the best mix of products. and services even if the sales reps dosen’t have the right knowledge or capacity to configure the products.
- Pricing: Prices and discounts may vary for various customers depending on a number of parameters; all of this is handled by CPQ, which ultimately prevents crucial price issues.
- Quote: In order to maintain a company’s fast-track sales cycle, organisations want to provide consumers with quotes as soon as possible. In this case, CPQ automatically prepares a quote using all the information provided while configuring and pricing the products and services and mails it to the customers.
for providing accurate quotes to the customers. The company needs to have experts who have very good technical expertise in the business that the organization is into. in order to configure the right products and apply the correct pricing and discounts. Finding all these skills in one person is very difficult. Having software like Salesforce CPQ helps you create a perfect quotation with amazing templates, making sure that there are no errors. Even if there are some, it identifies it and highlights it to you before sending a quote to customers.
Advantages of Salesforce CPQ
- Automated pricing
- Automated control over discounts
- Reduce the manpower required in the quote generation process
- Accurate and formatted quote generation
Steps before installing CPQ
Before installing CPQ, make sure your Salesforce org has the necessary permissions enabled.
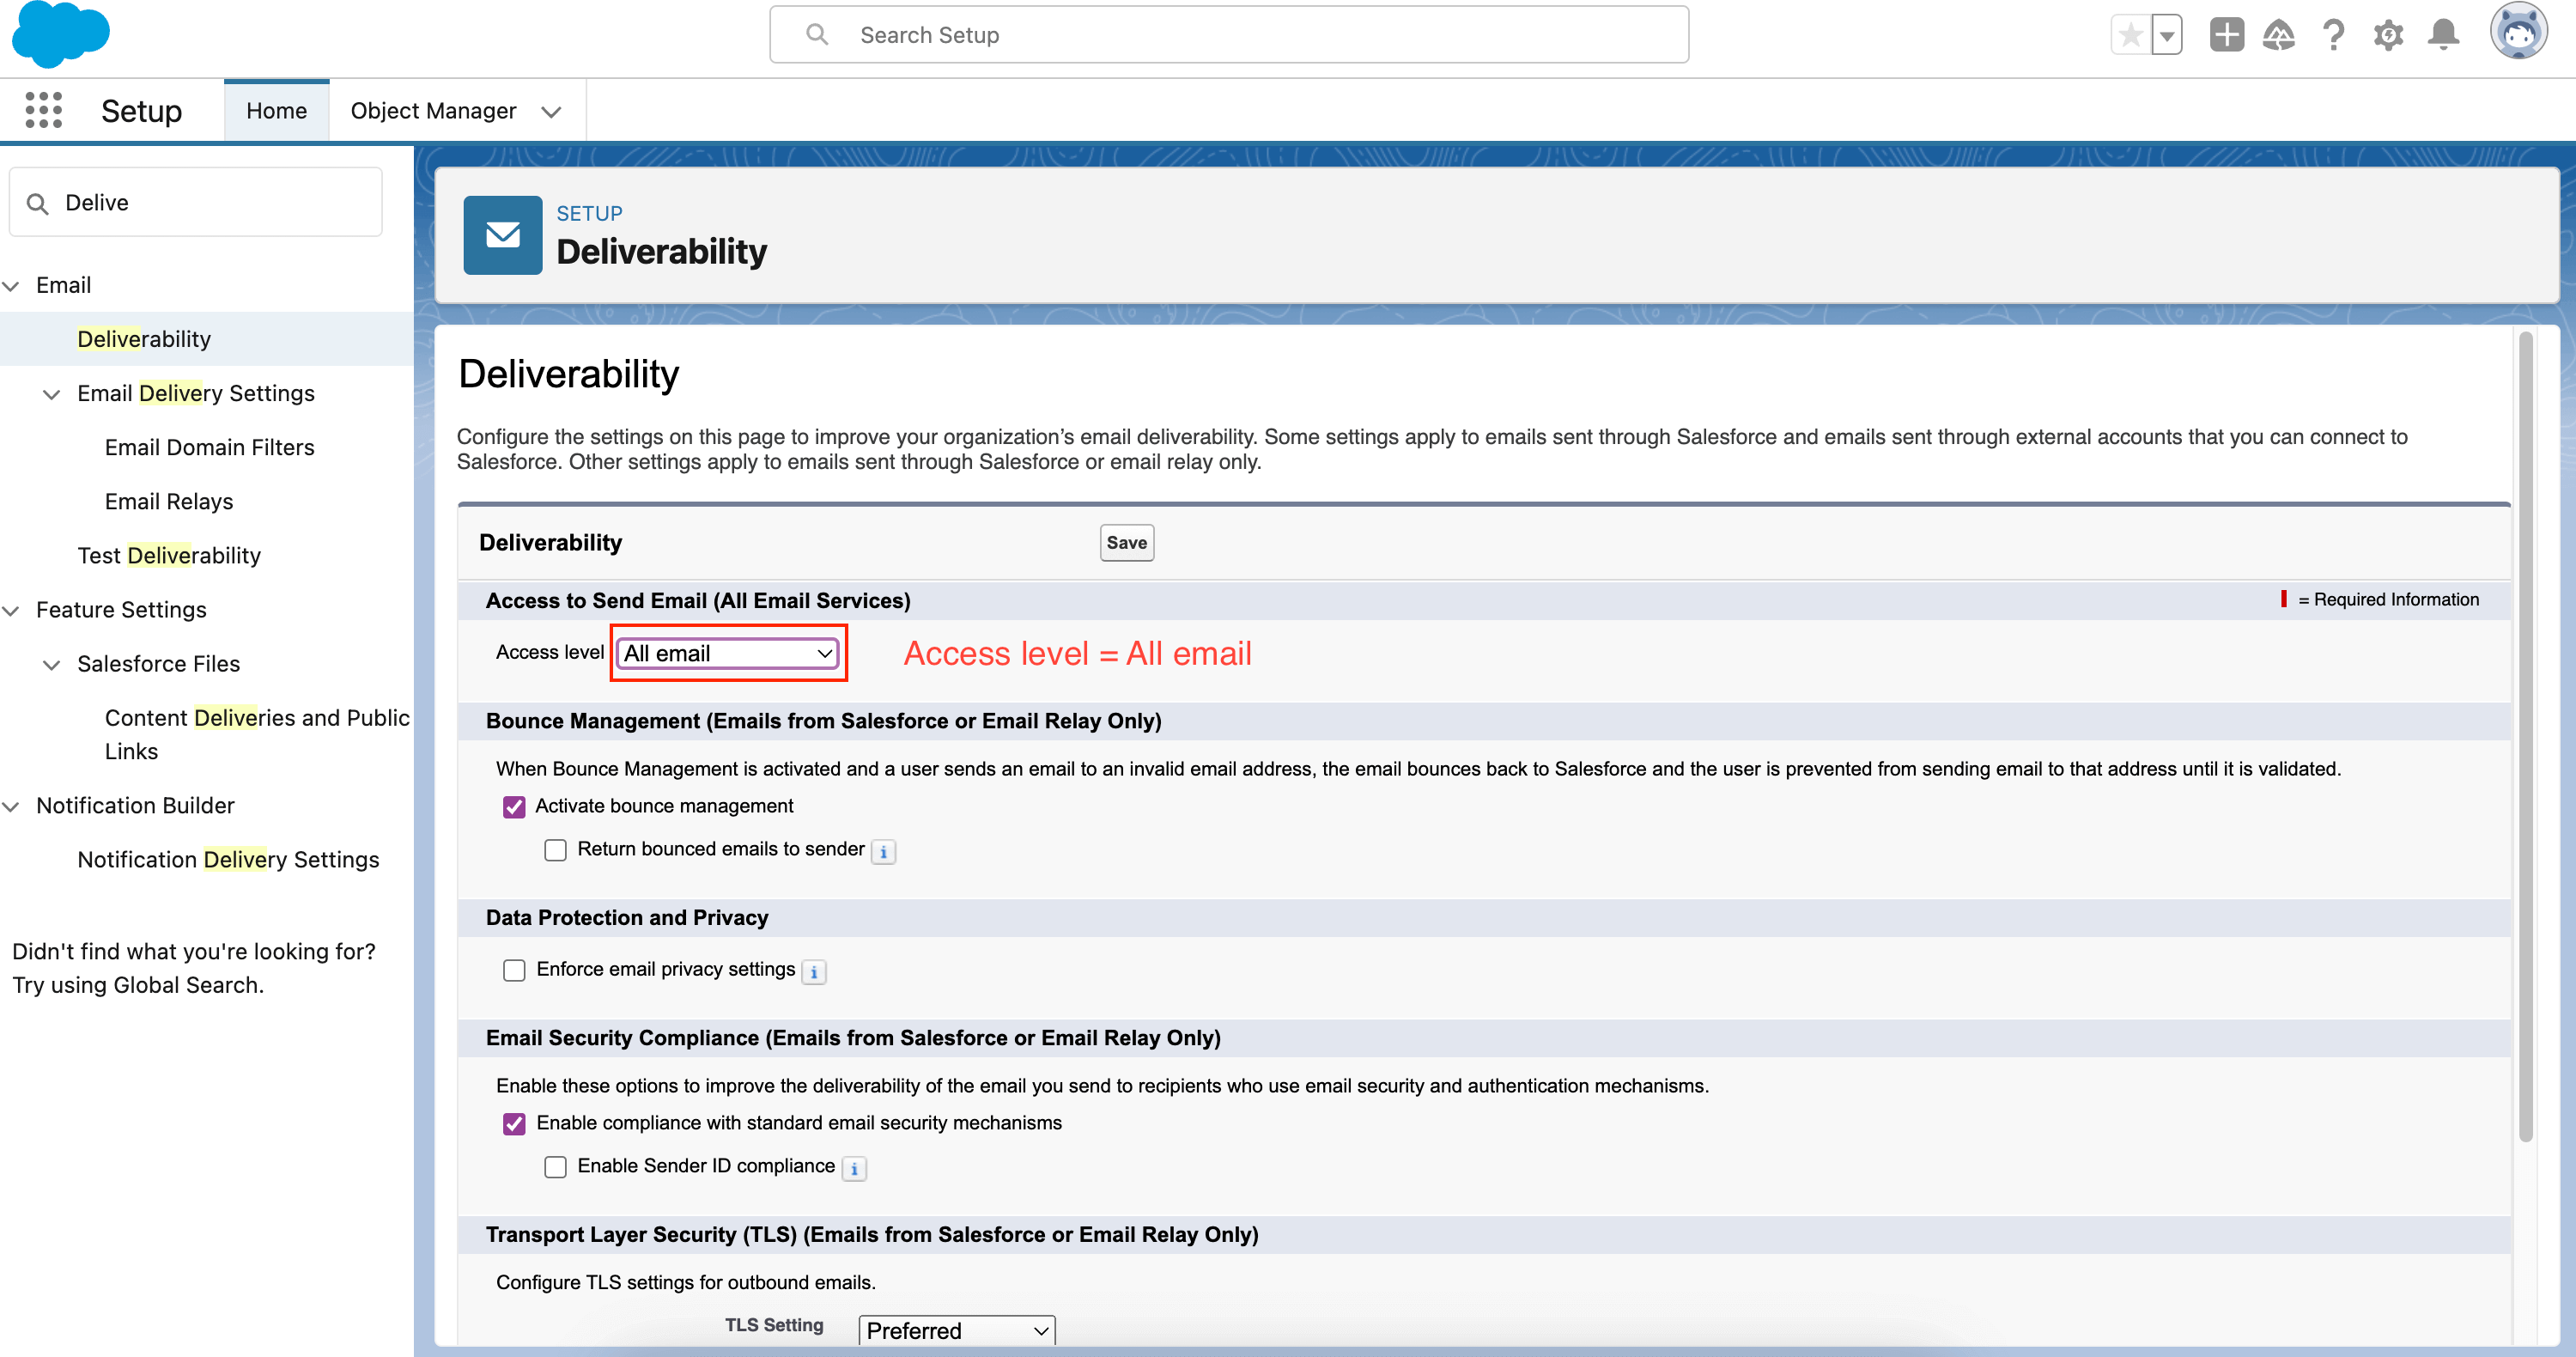
- Email deliverability for all users.
- Navigate to Setup | Administer | Email Administration | Deliverability
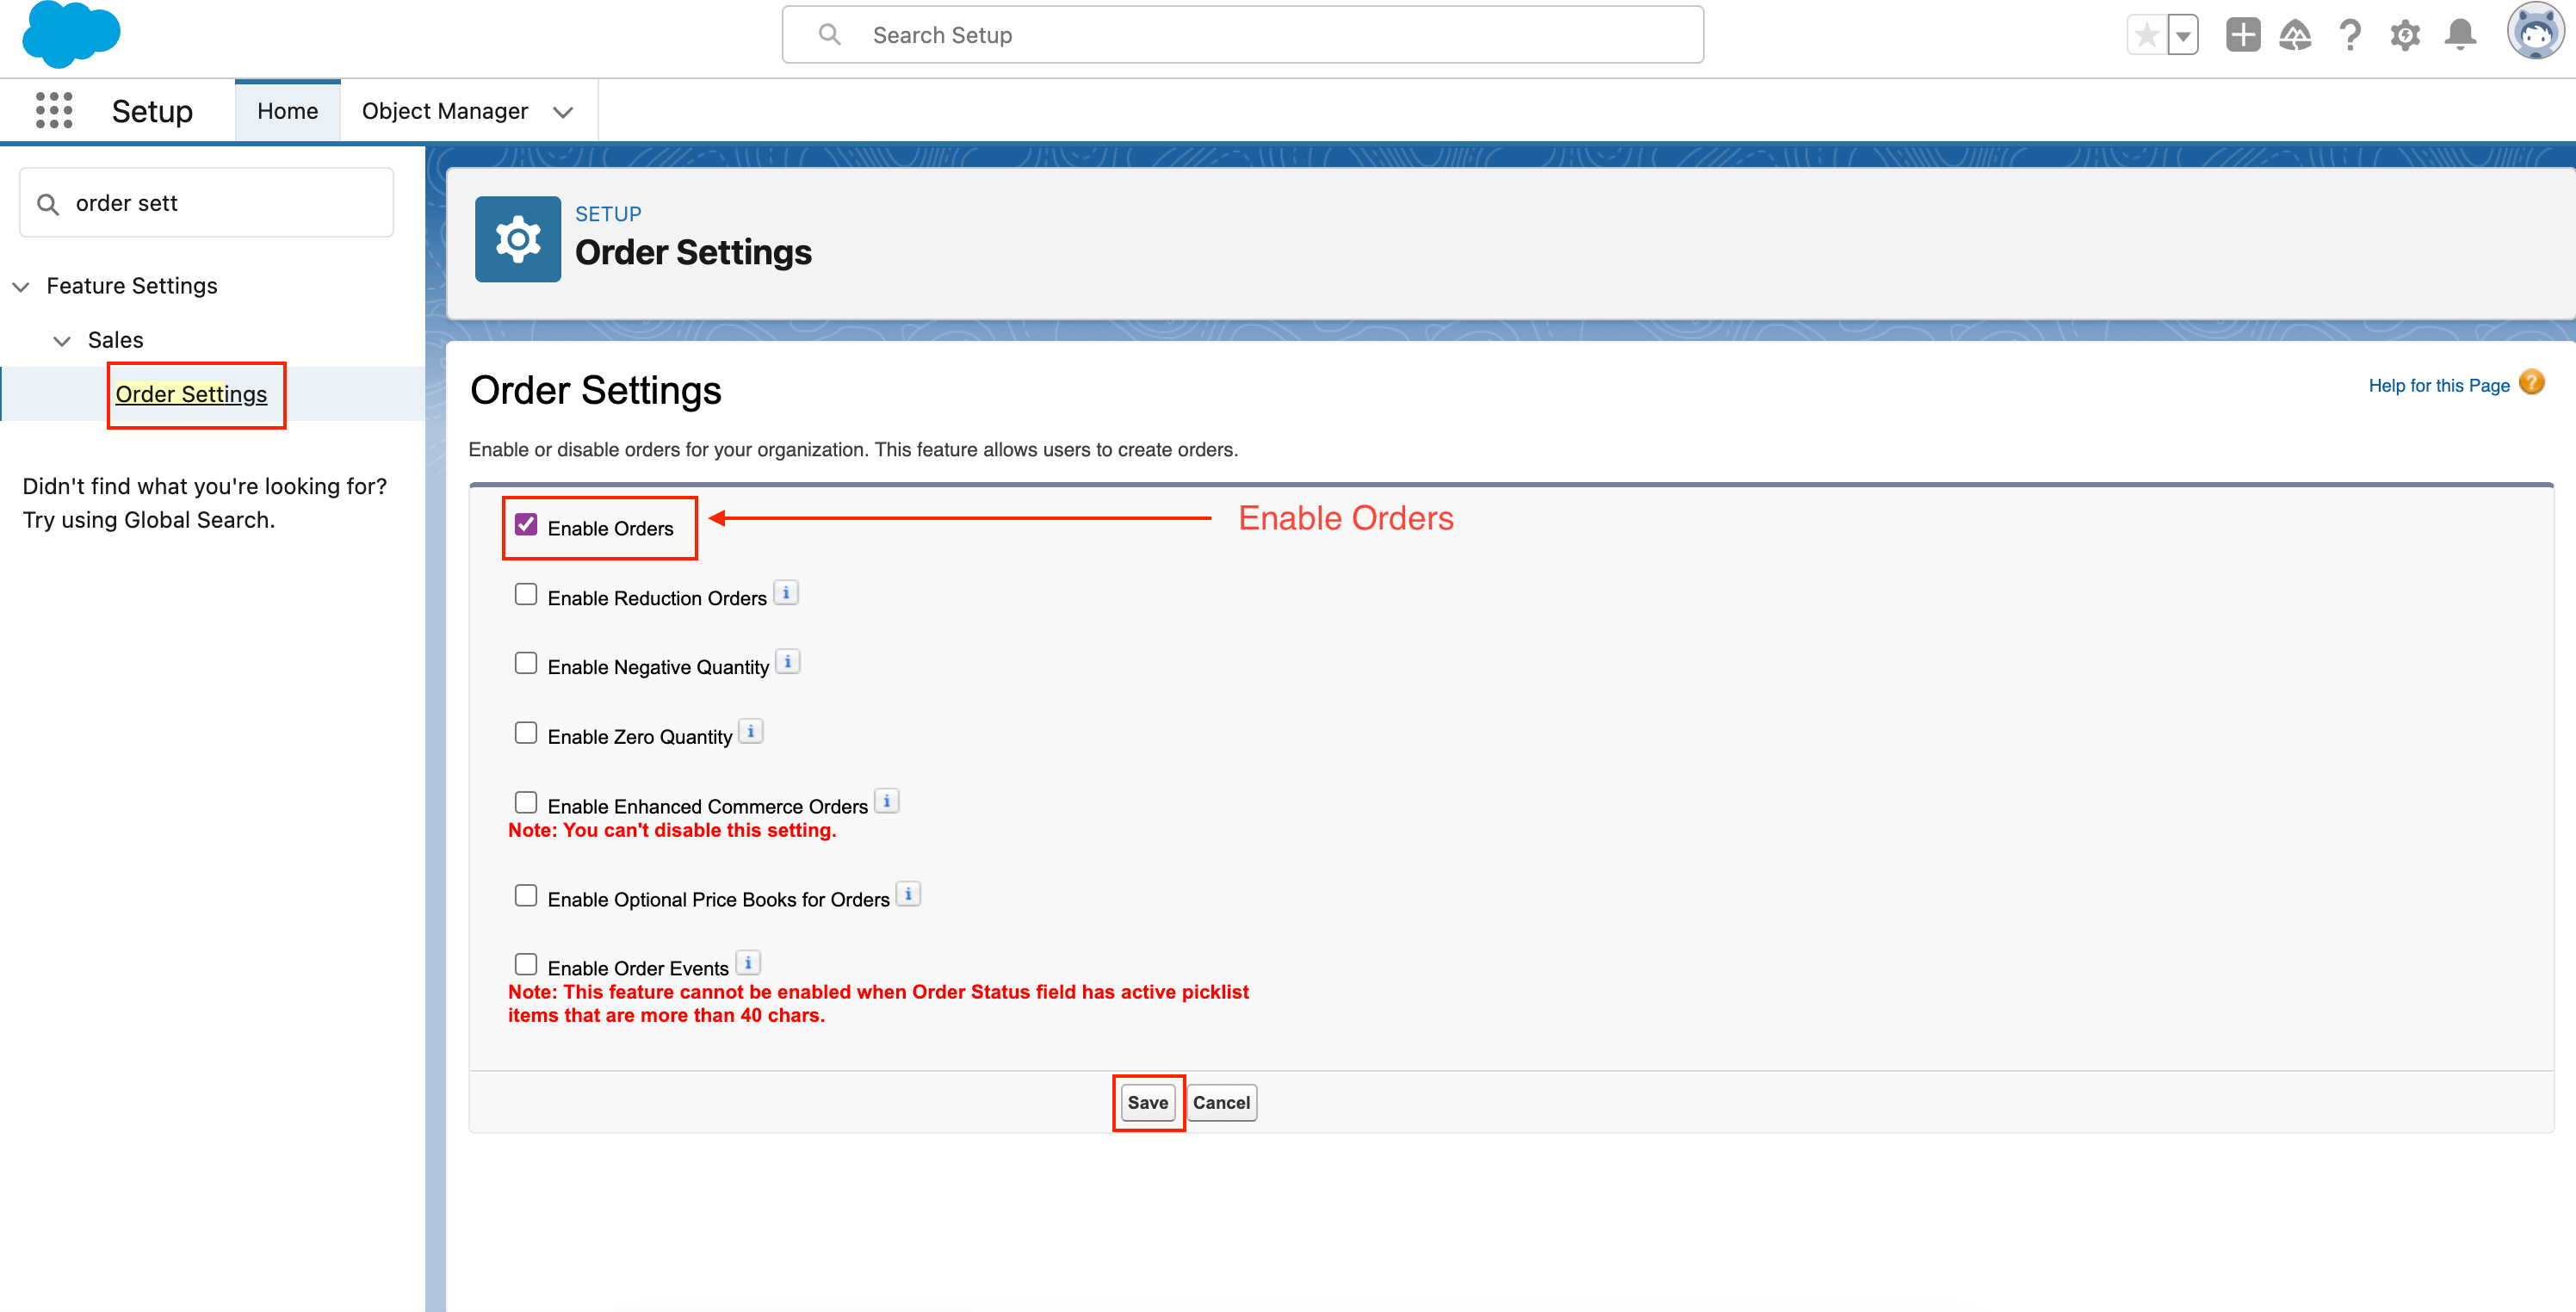
- Enable Orders.
- Navigate to Setup | Build | Customize | Orders | Order Settings.
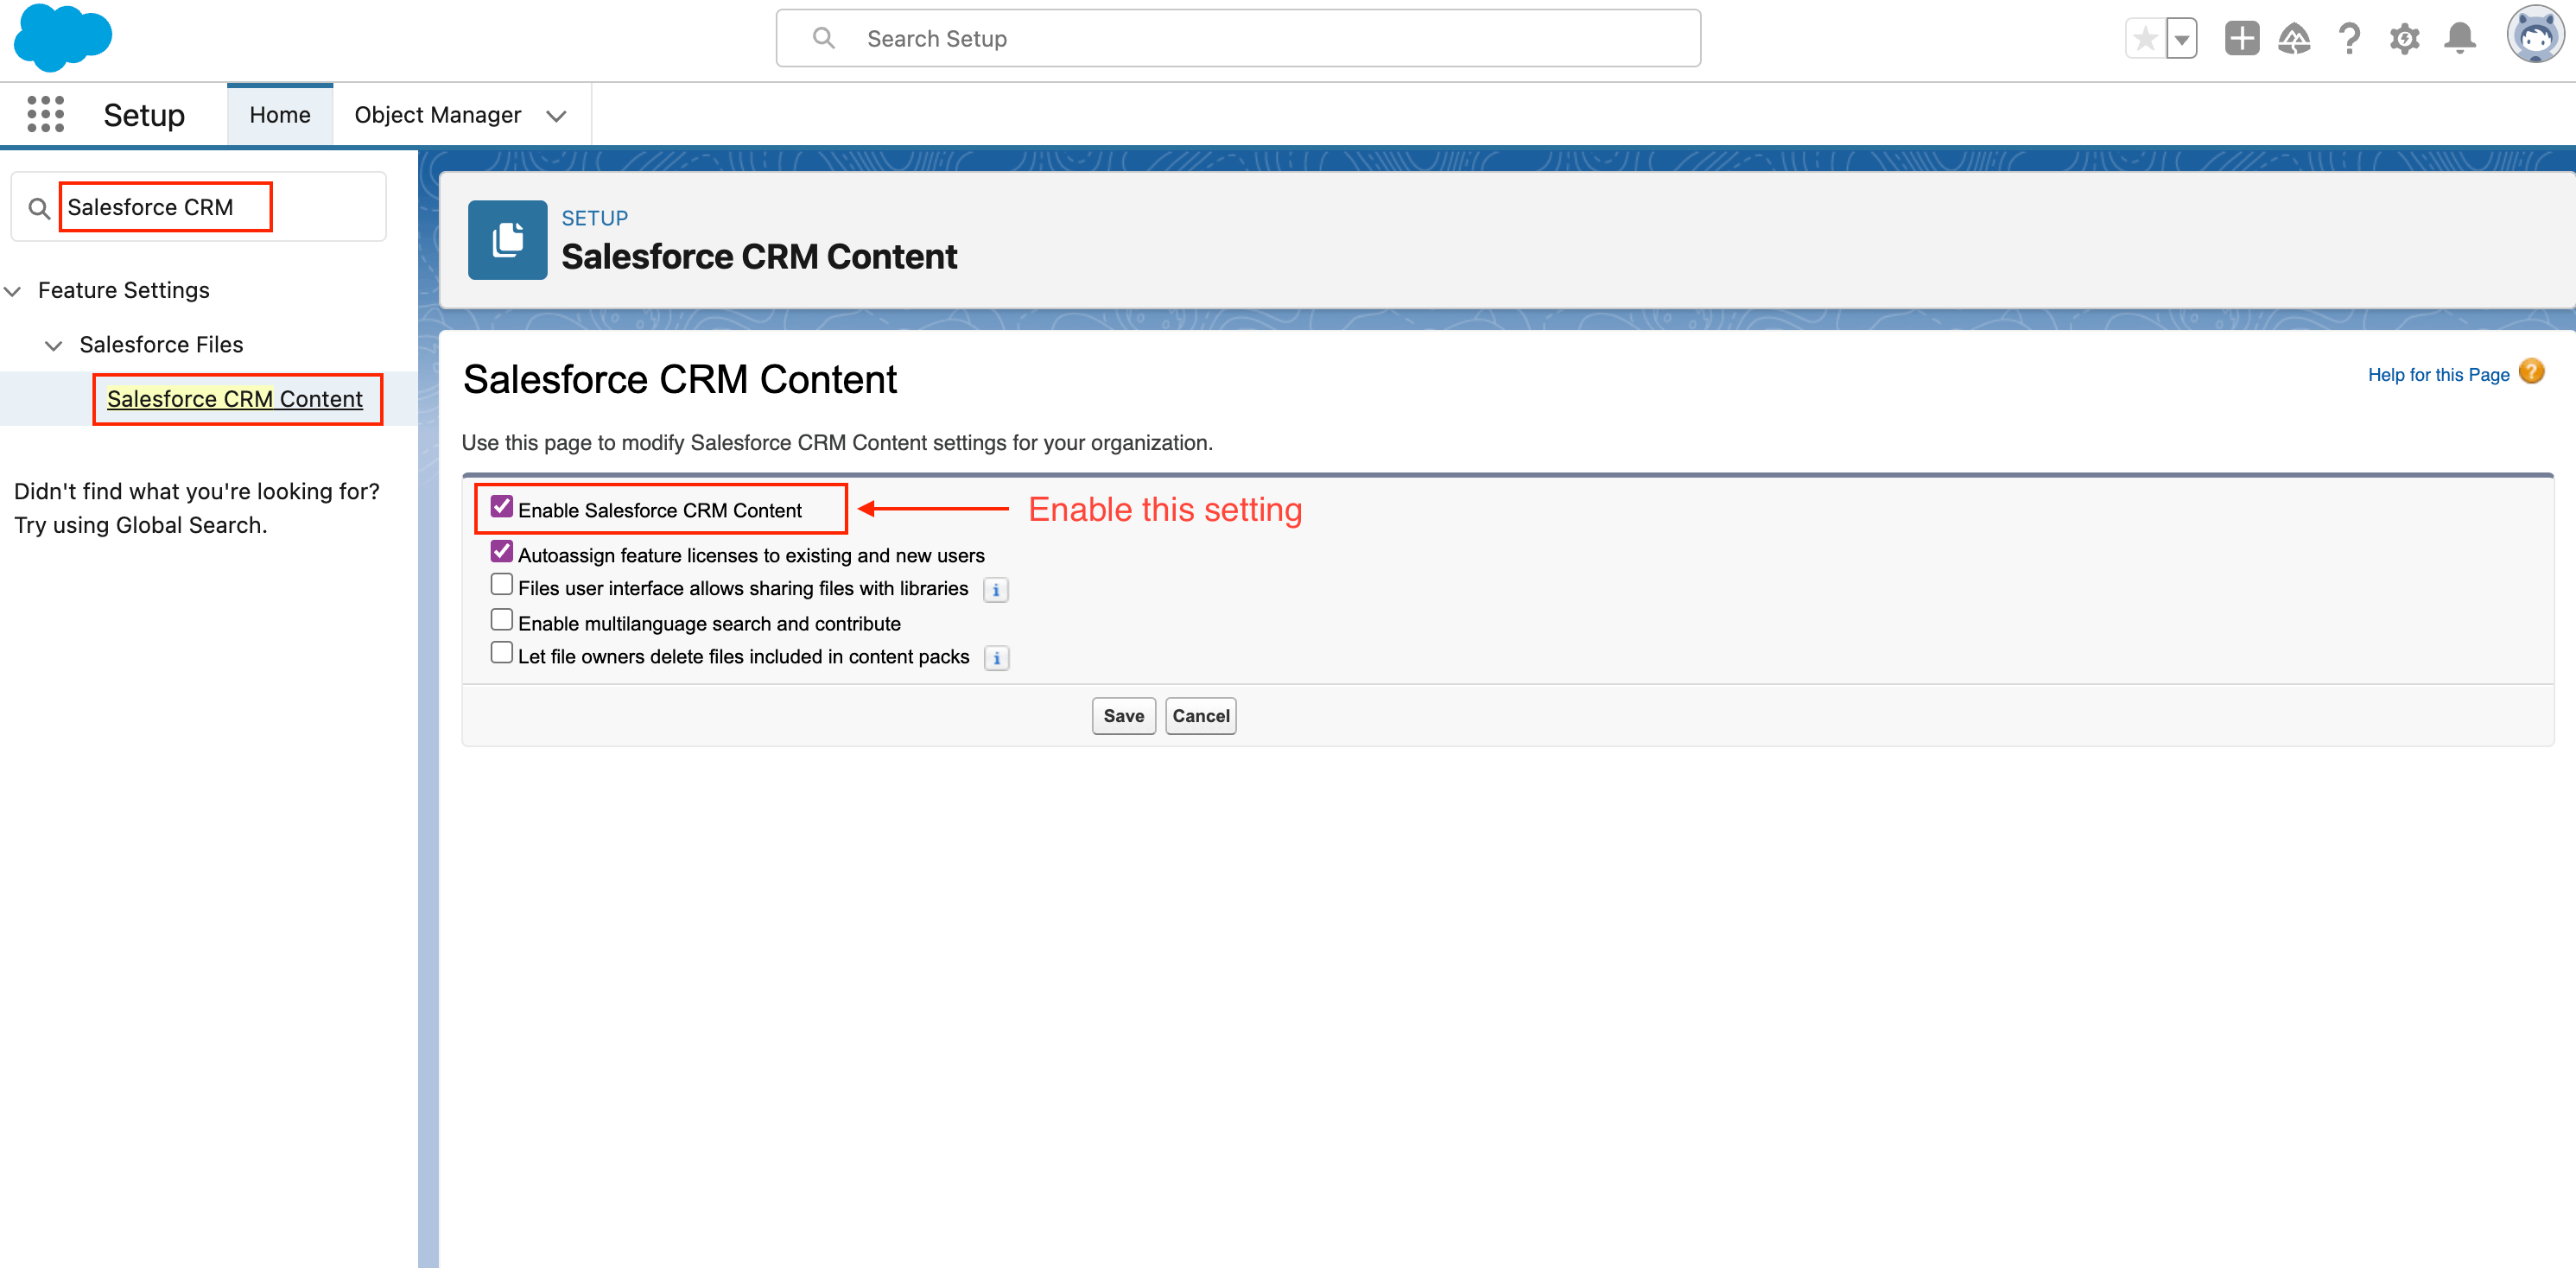
- Enable CRM content.
- Navigate to Setup | Build | Customize | Salesforce Files | Settings | Salesforce CRM Content.
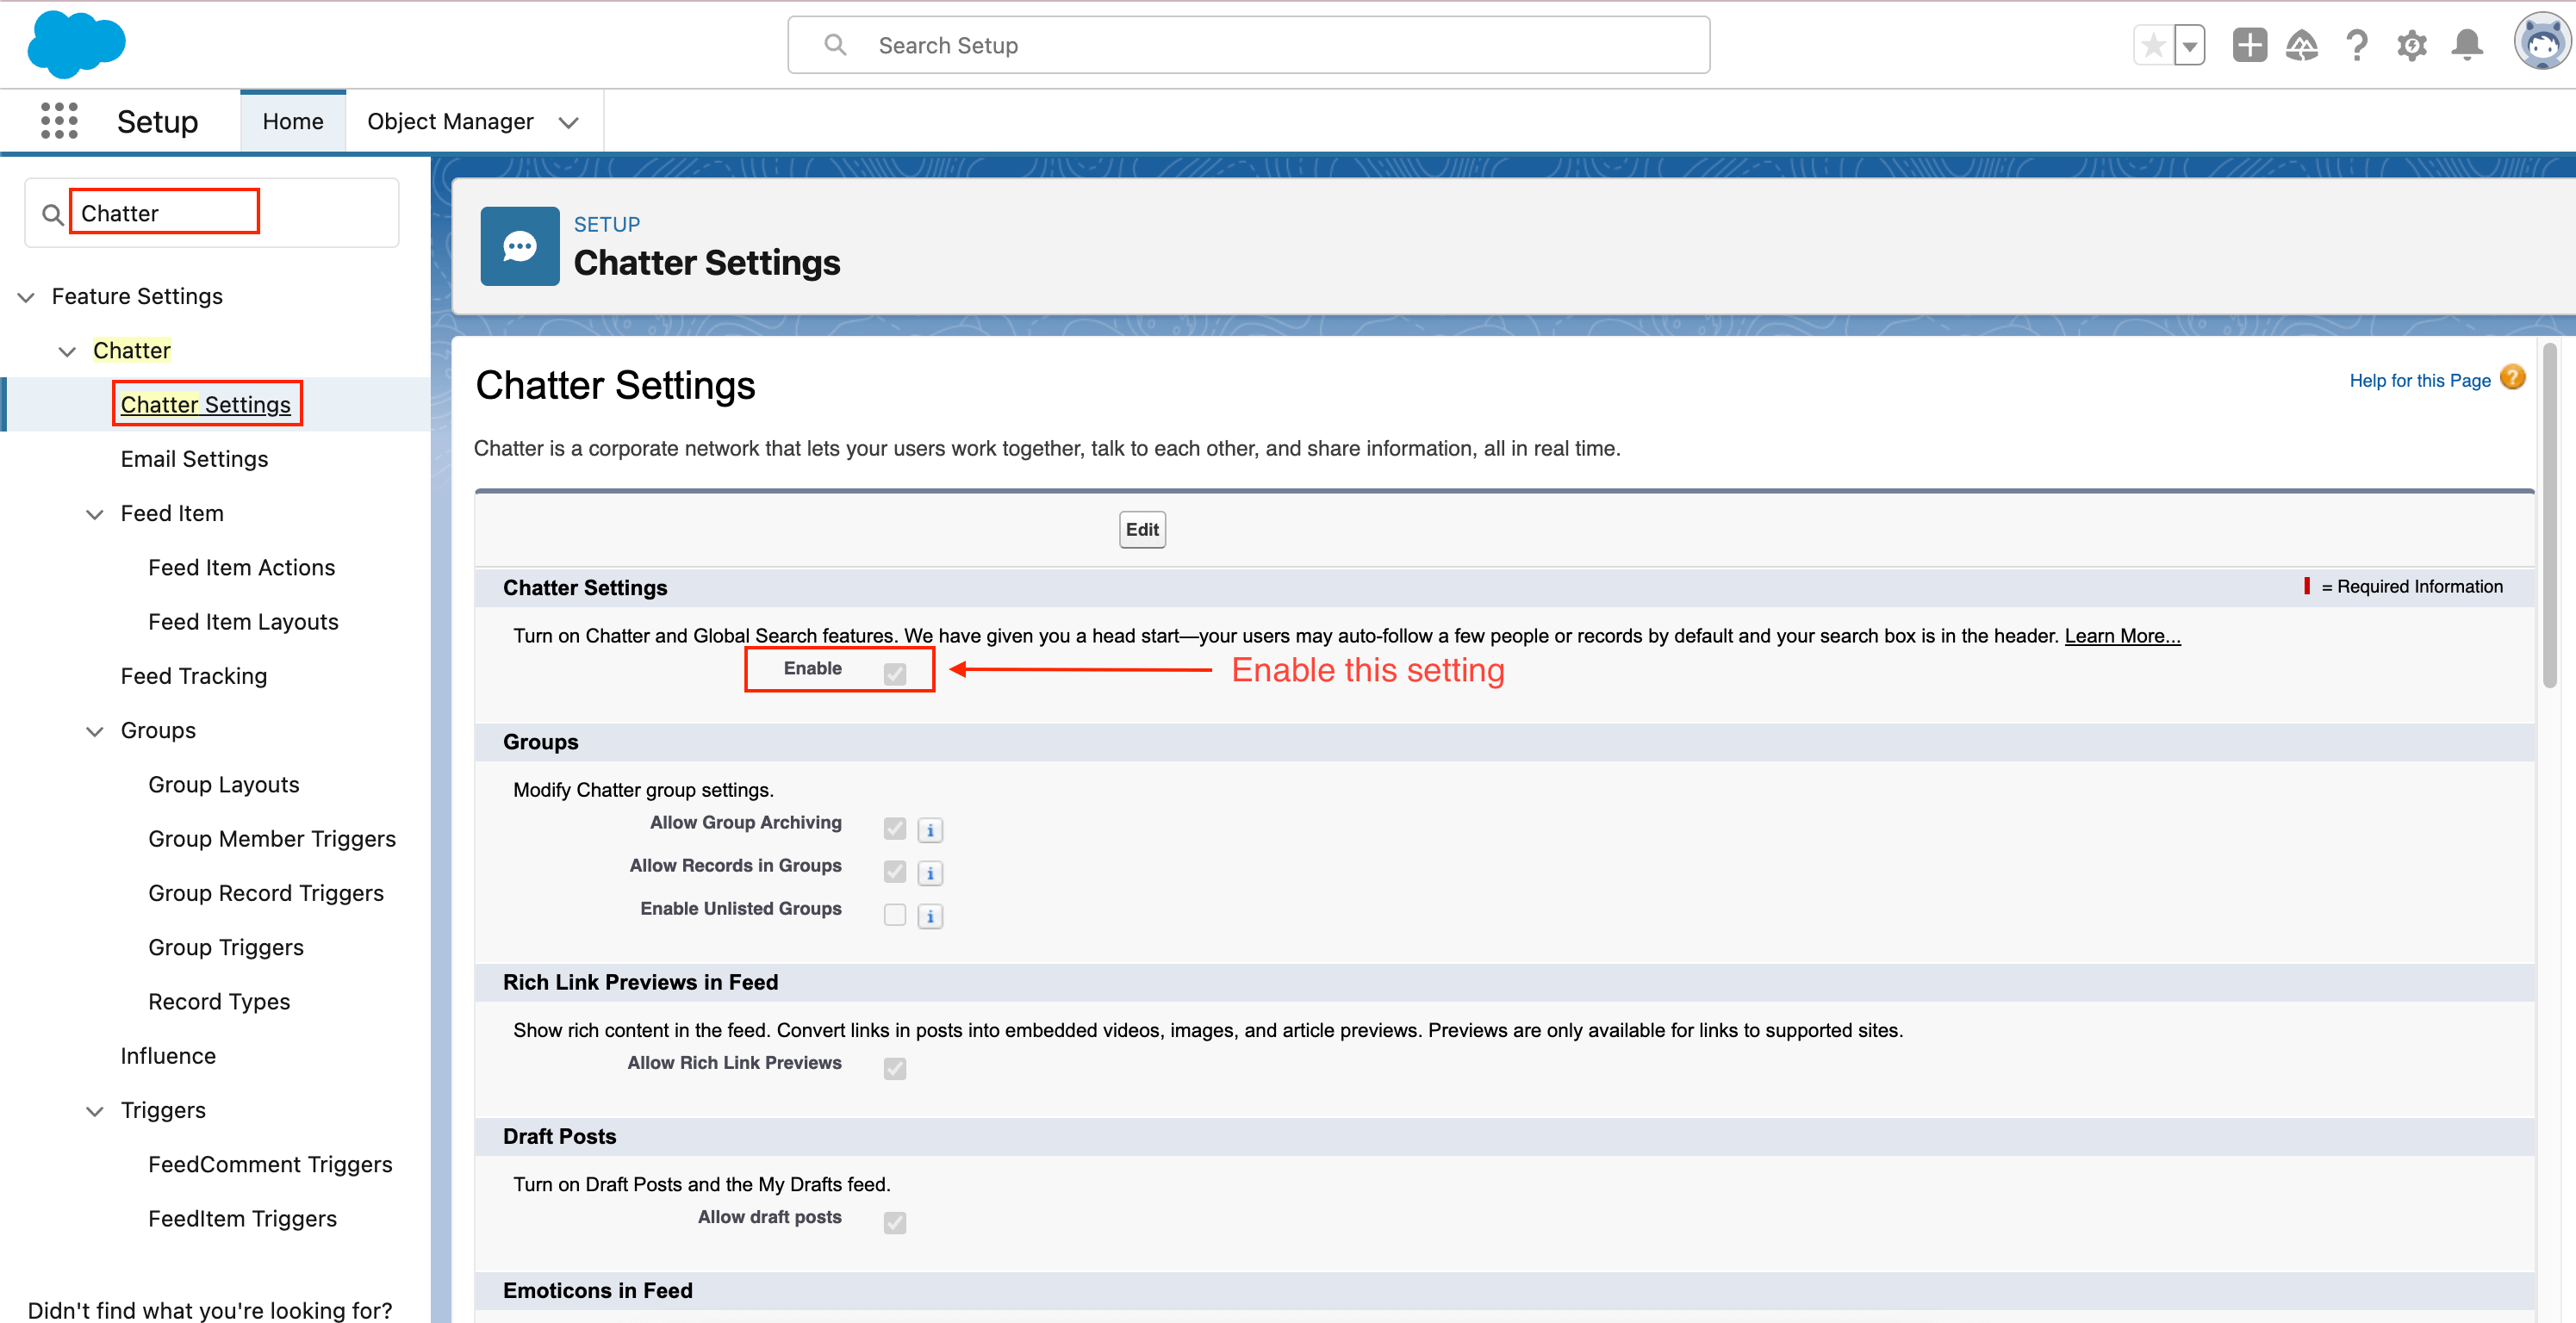
- Enable Chatter.
- Navigate to Setup | Build | Customize | Orders | Order Settings.
How to install CPQ package in your Salesforce Org
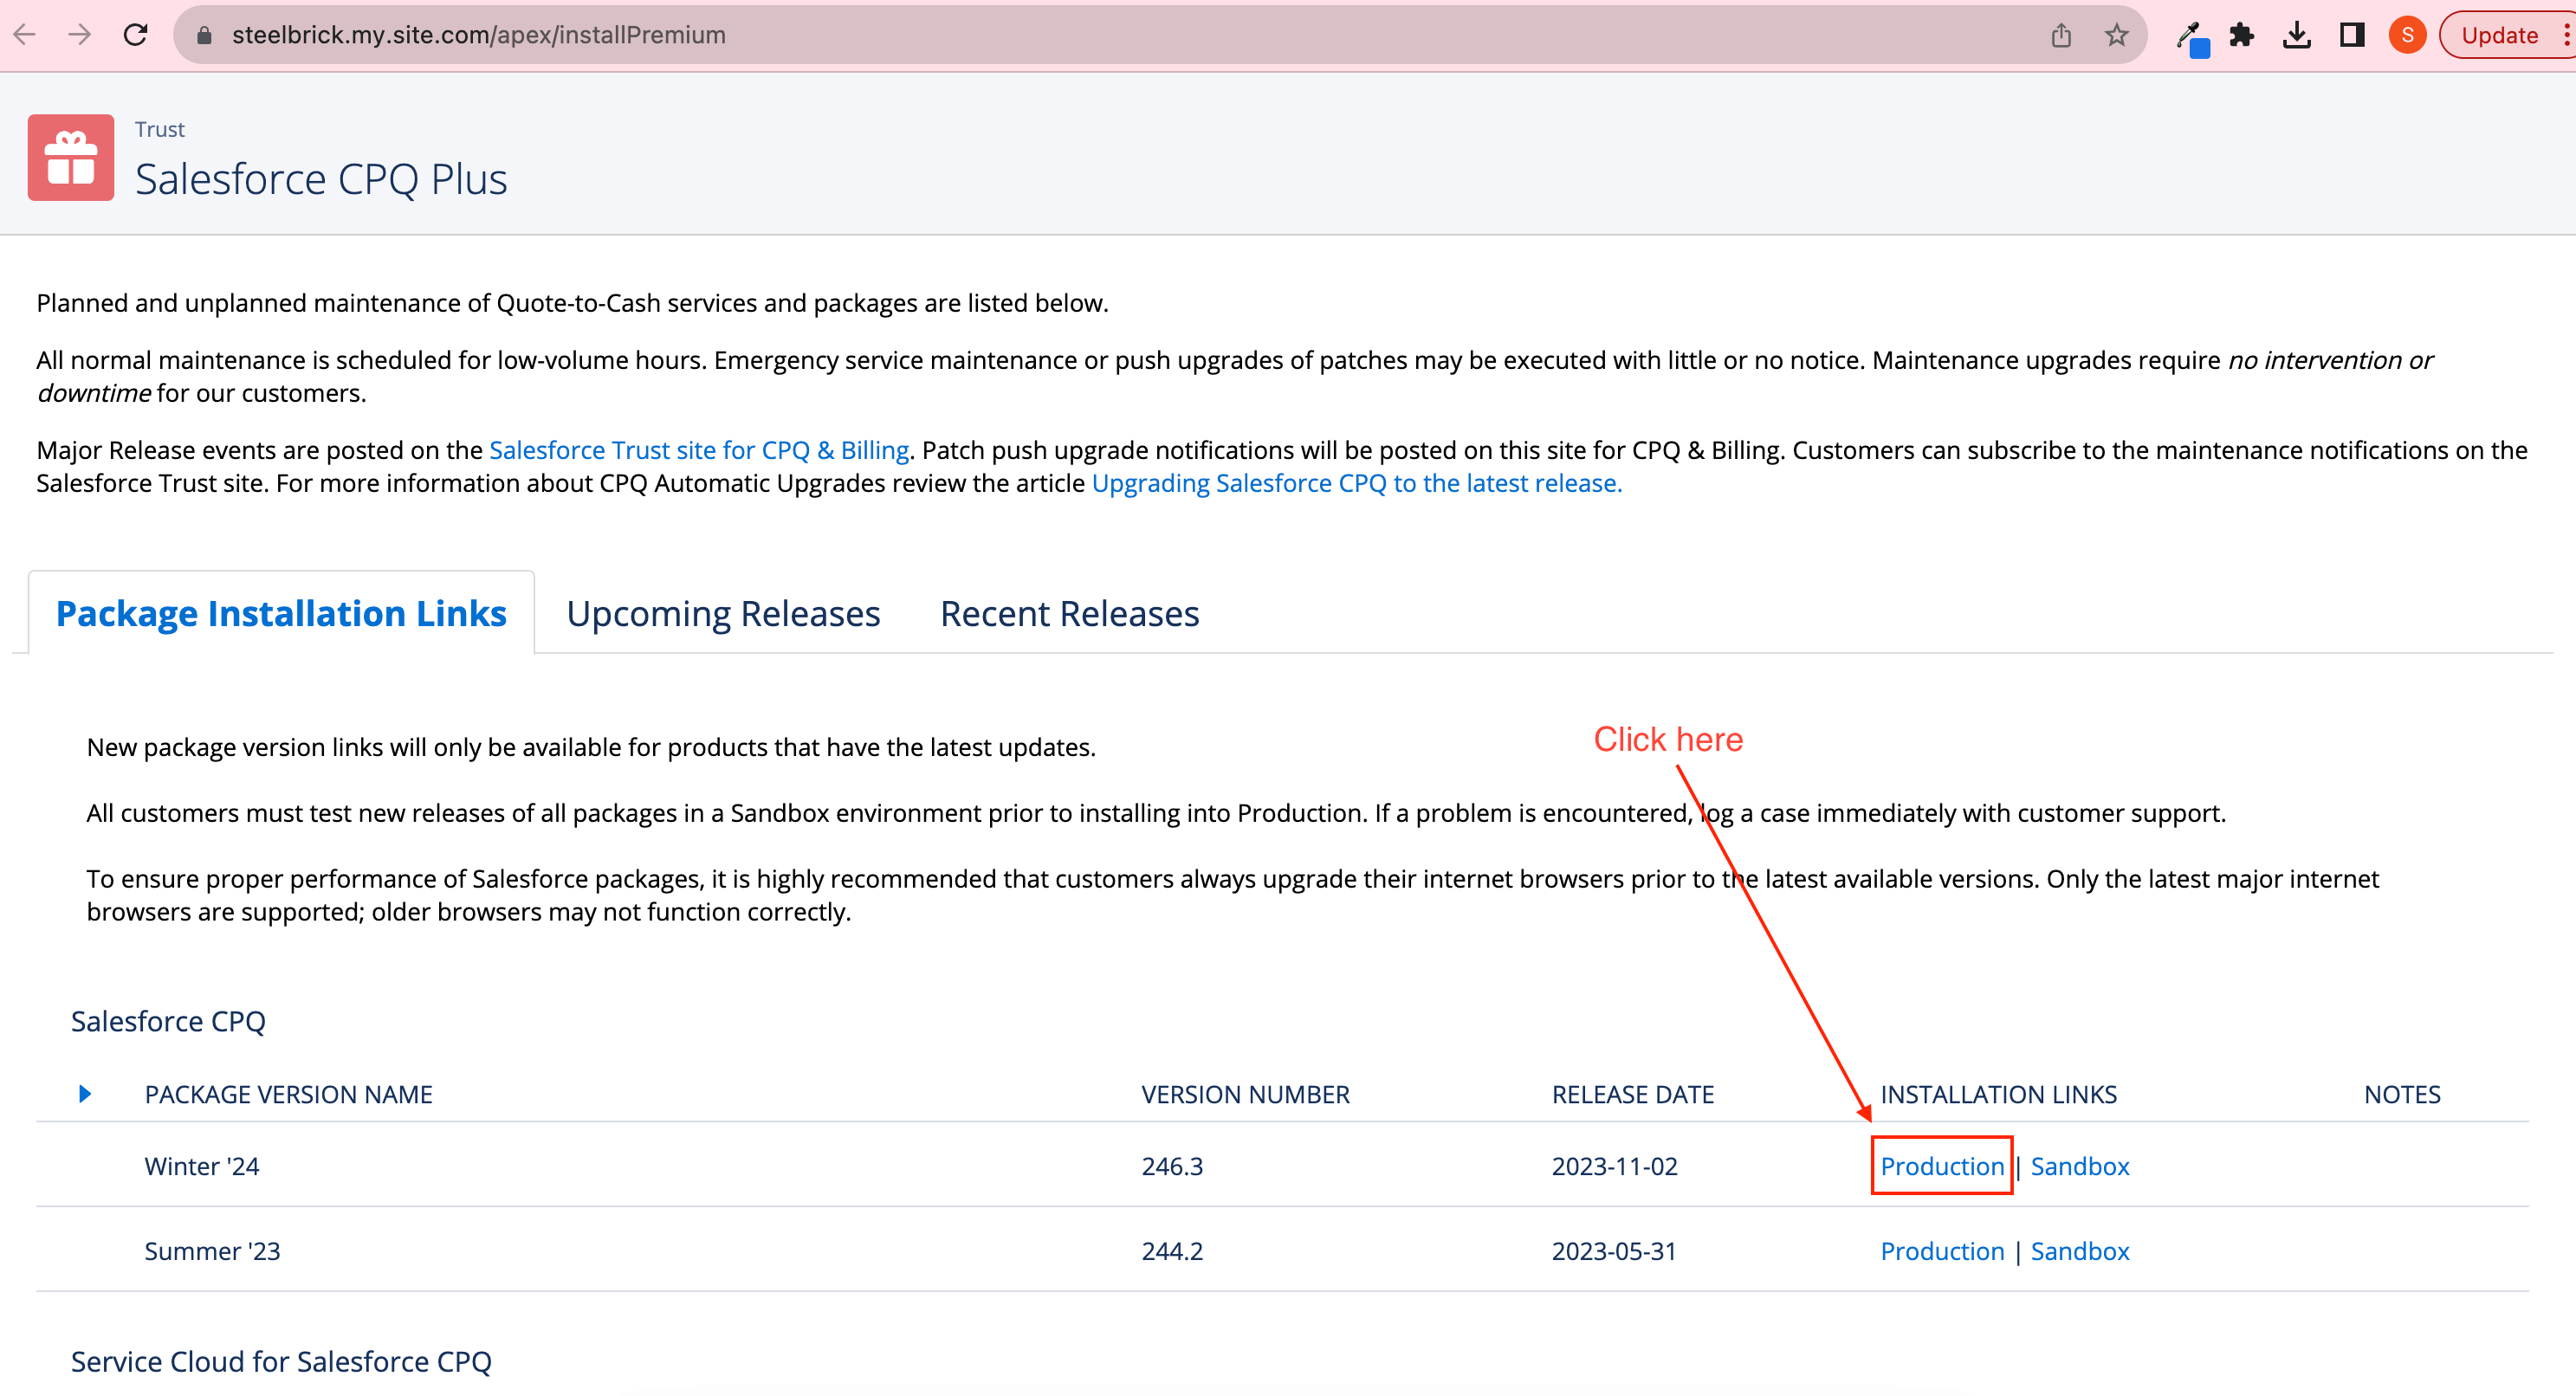
- Navigate to the below-mentioned link to find all the packages available for Salesforce CPQ:
Salesforce CPQ Installation Links - If you are installing in your production or developer Org, please choose production as the installation link; otherwise, choose Sandbox.
- Now you will be redirected to the Salesforce login screen. Login with your Org’s credentials.
- After successfully logging in, you will be redirected to the Security Level Selection page. Salesforce recommends granting access to all users. Choosing other options can lead to extensive time spent adjusting permissions later. Select the appropriate security setting and click install.
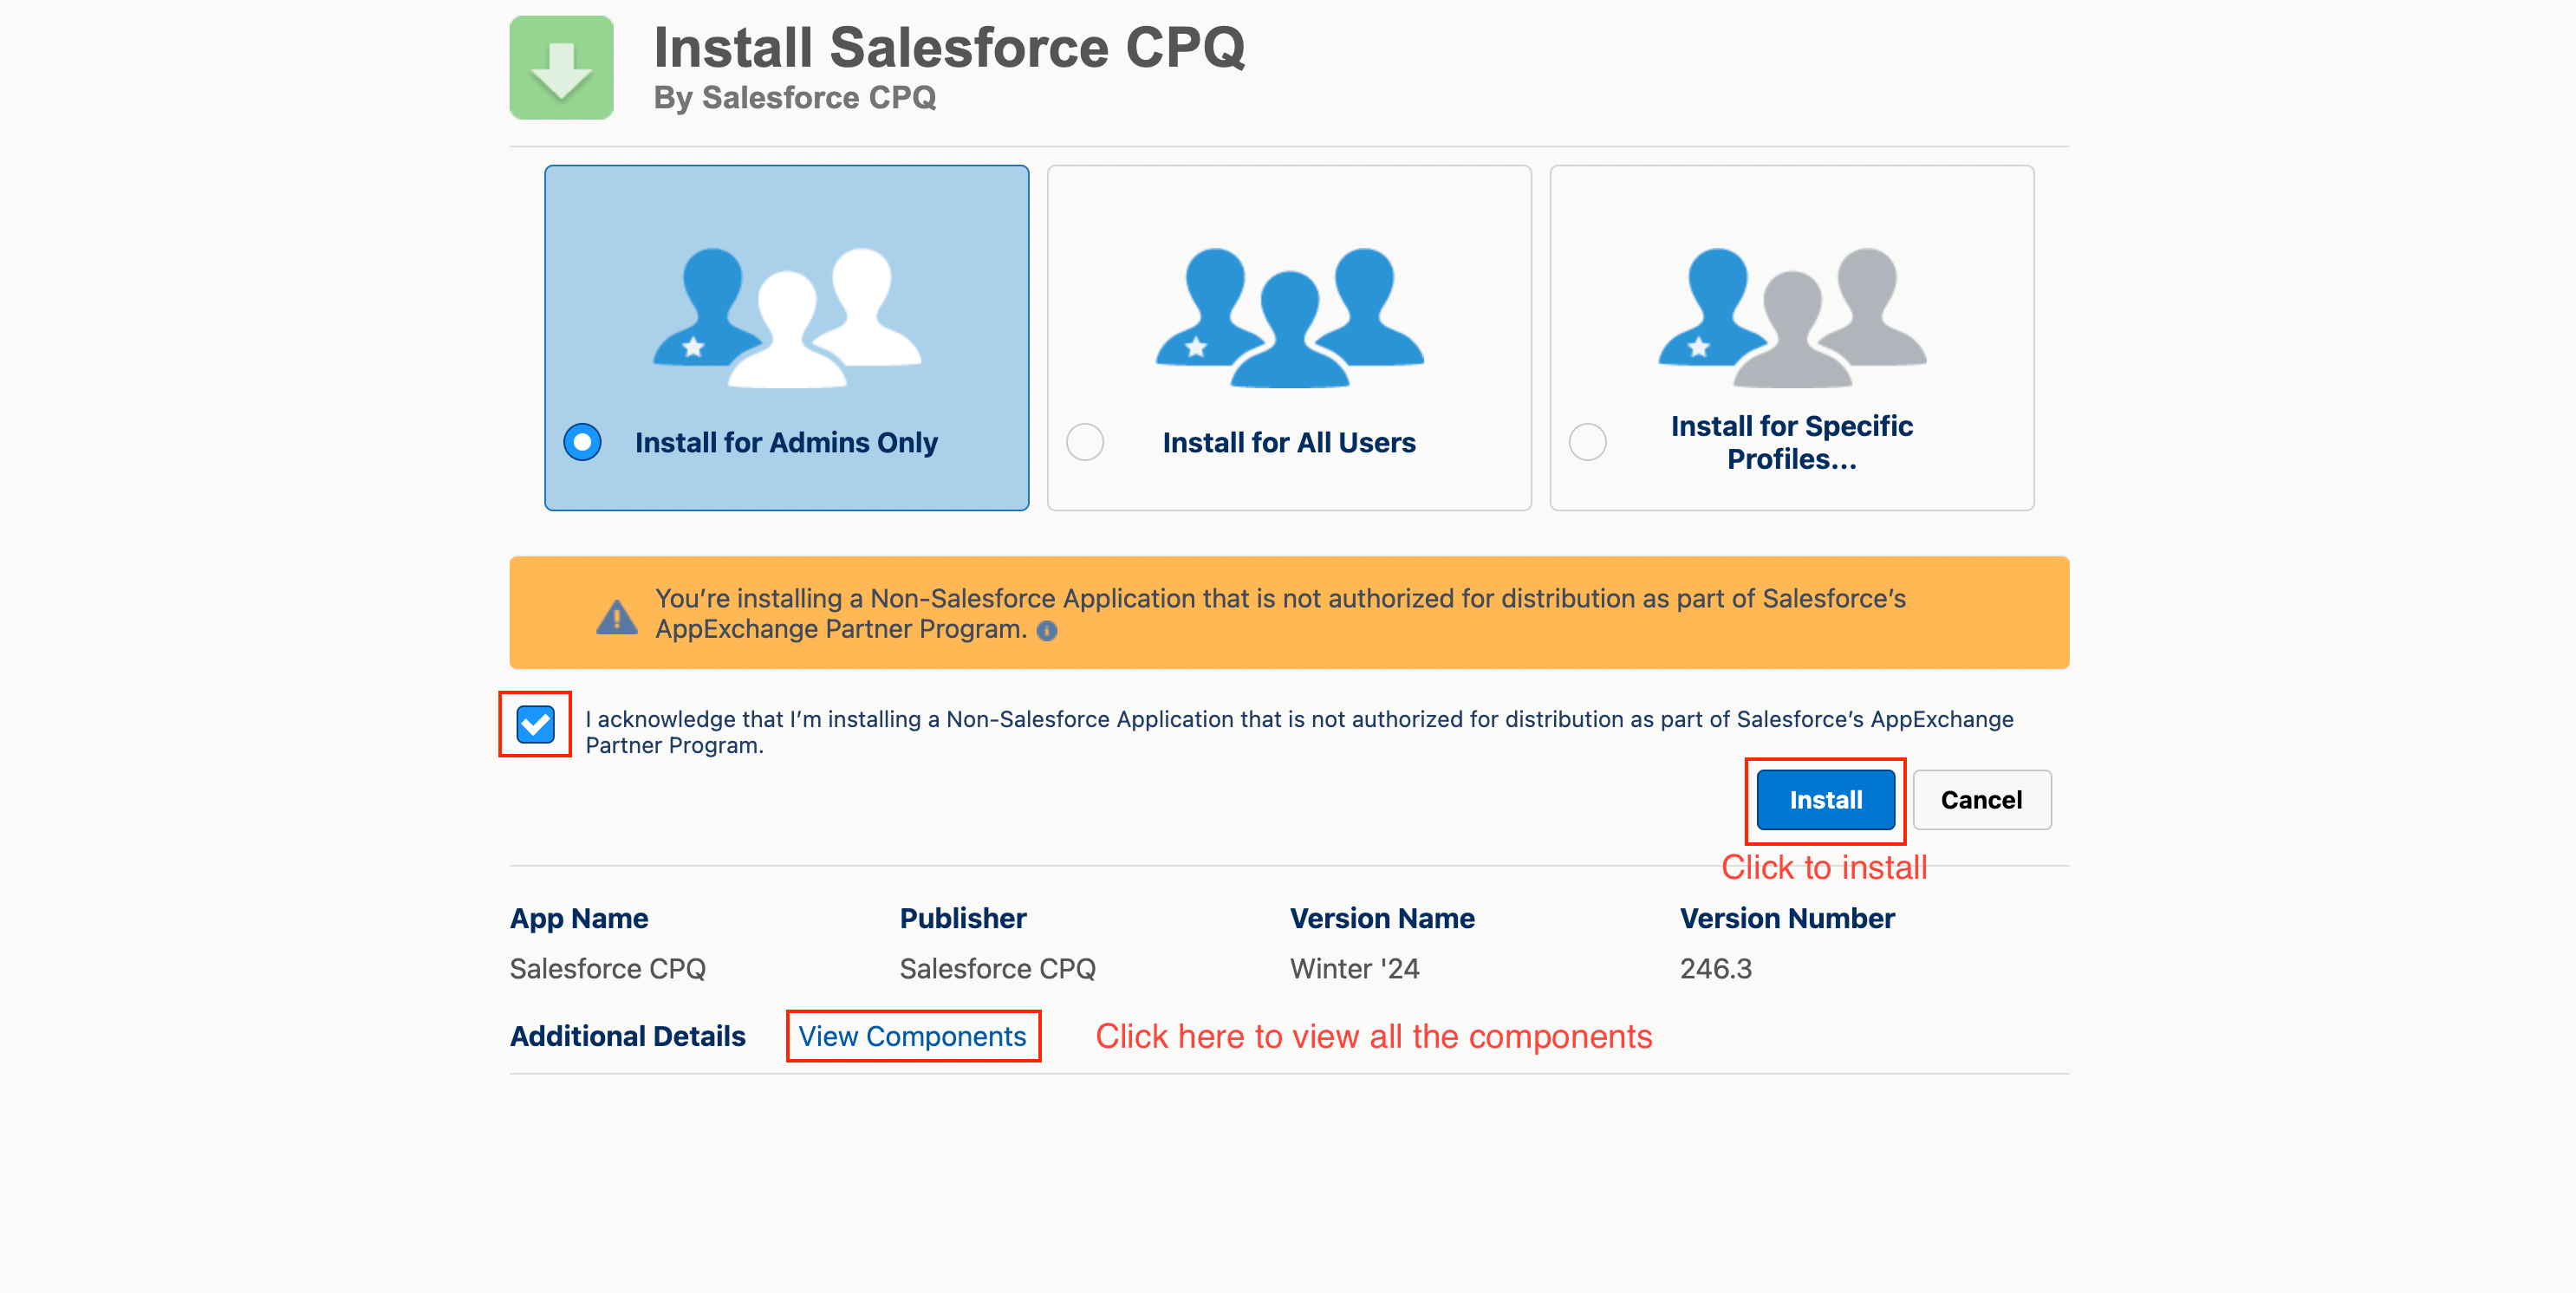
- You can review the Salesforce CPQ package components through the View Components link.
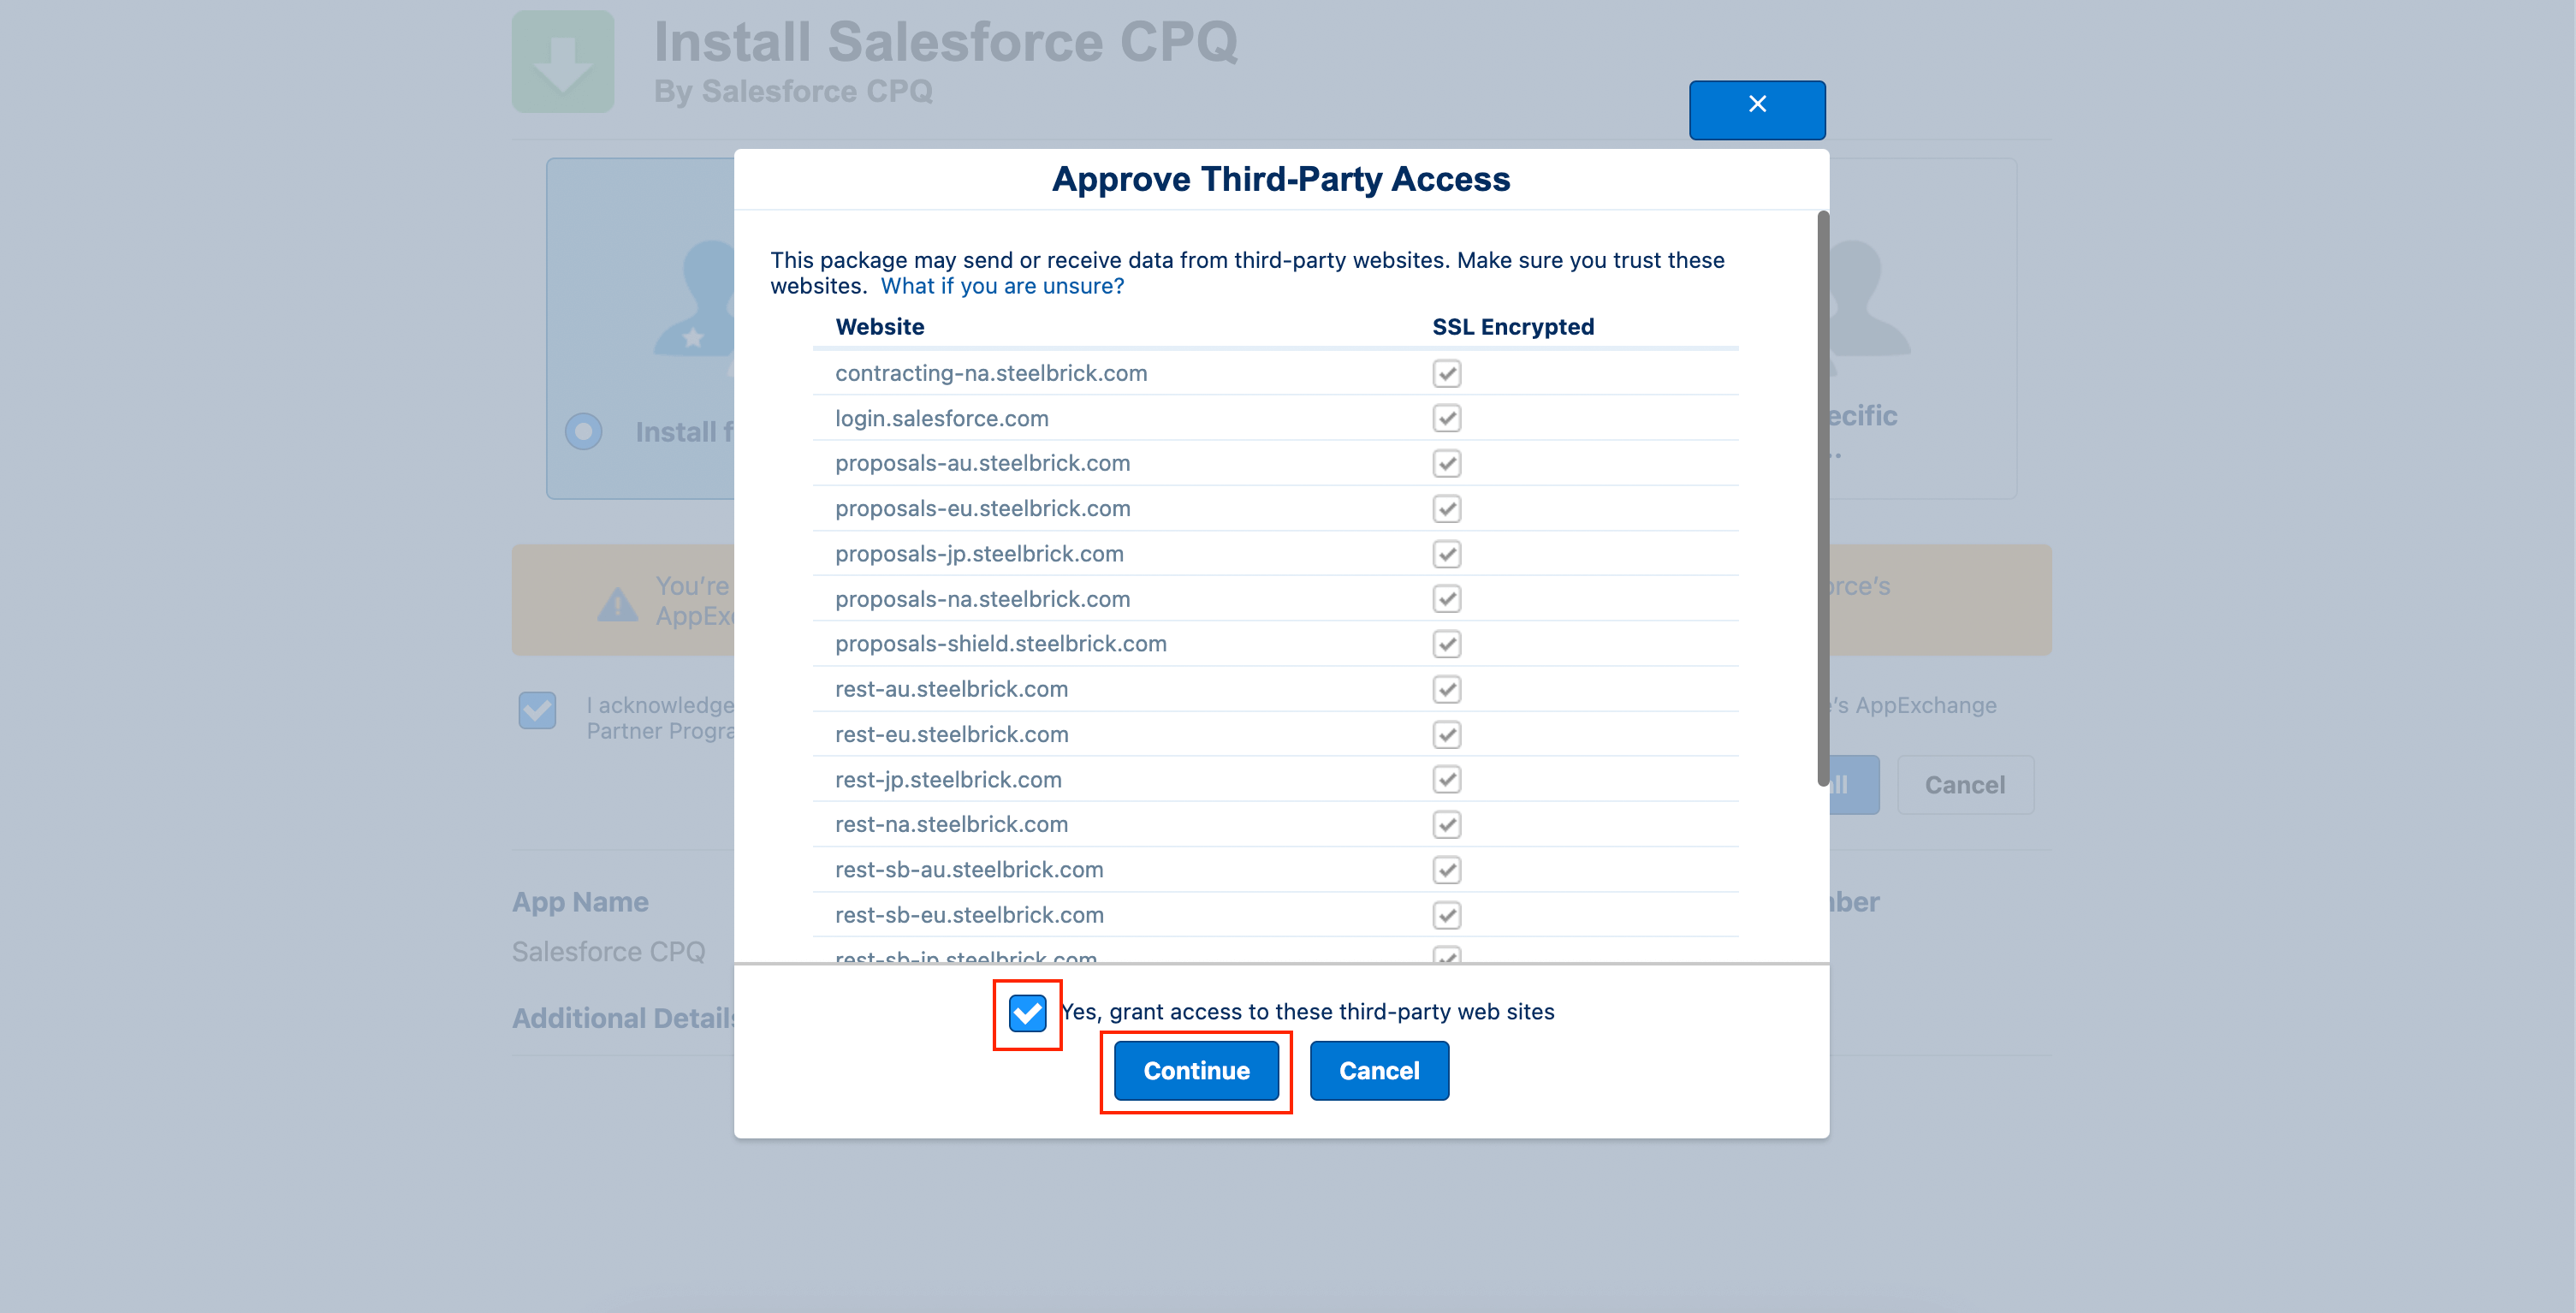
- After you click install, it will ask permission for third-party access. Third-Party Permissions: Select “Yes, grant access to these third-party websites” and then click Continue.
- After clicking Continue, you will be sent to the installation in progress screen. Salesforce CPQ installation is now in progress. You will be notified via email once it is installed successfully.
- Once you receive an email from Salesforce stating that the installation has been successfully completed, you can confirm that by going to Setup | Build | Installed Packages.
Post-installation steps
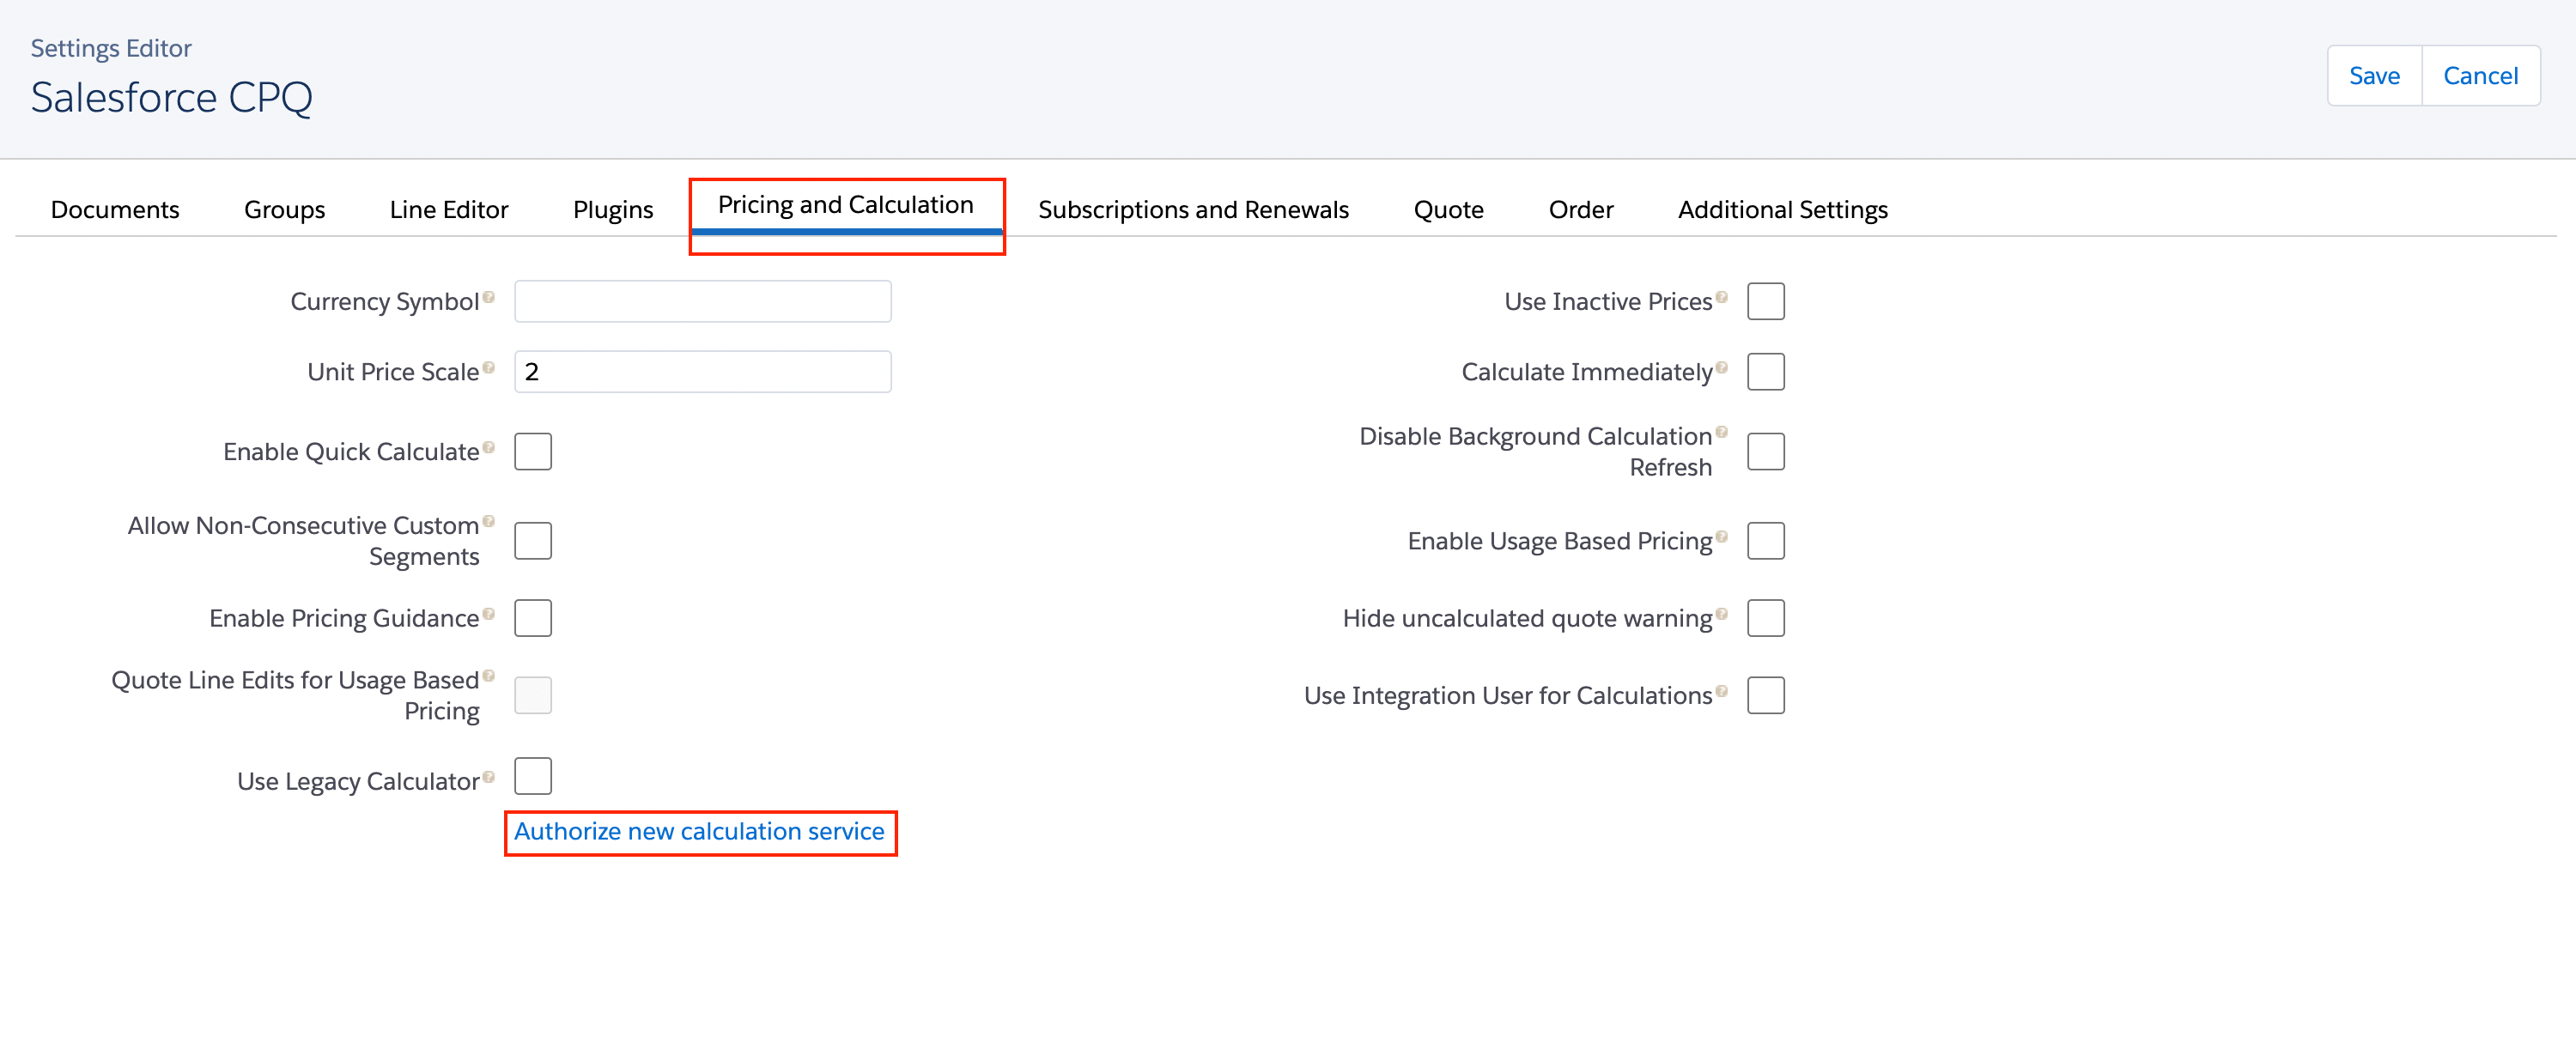
- You need to Authorize the New calculation services
- If you are installing Salesforce CPQ for the first time, go to Setup | Build | Installed Packages | Salesforce CPQ | Configure | Pricing and Calculation, and click Authorize New Calculation Service.

- If you are installing Salesforce CPQ for the first time, go to Setup | Build | Installed Packages | Salesforce CPQ | Configure | Pricing and Calculation, and click Authorize New Calculation Service.
- Execute the post-install script
- Navigate to Setup | Build | Installed Packages | Salesforce CPQ | Configure | Additional Settings and click execute.
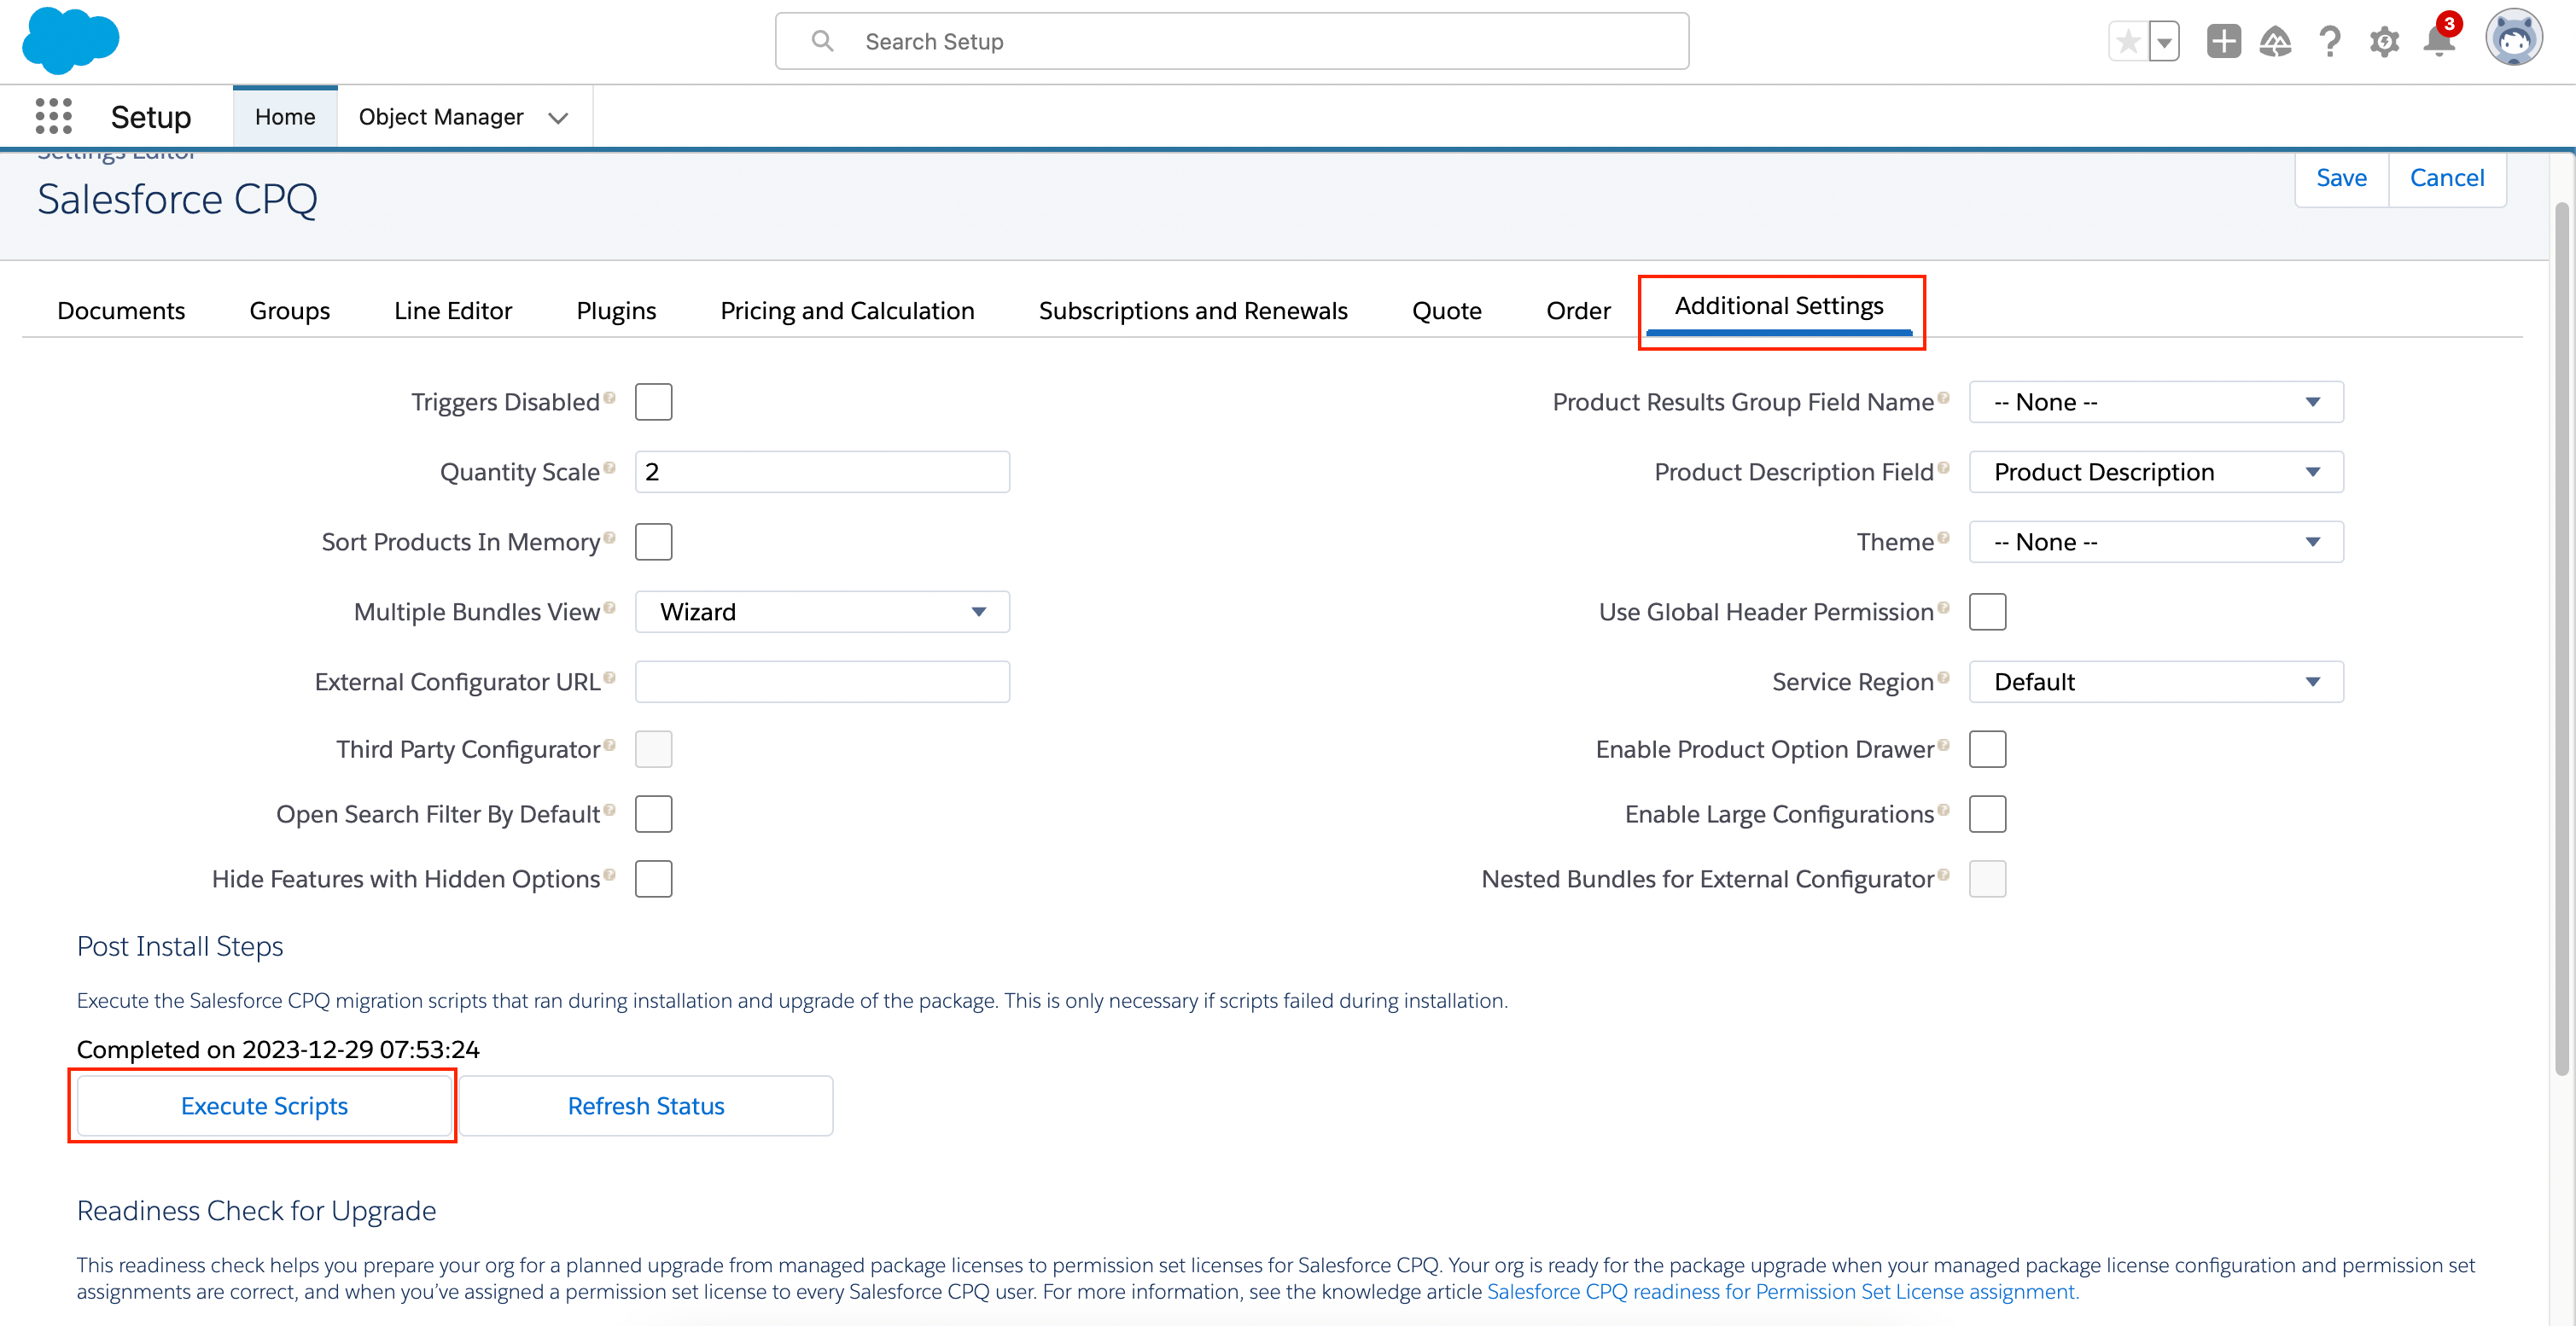
- Navigate to Setup | Build | Installed Packages | Salesforce CPQ | Configure | Additional Settings and click execute.
- Change the page layout assignment for the following objects :
- Salesforce CPQ has a set of pre-packaged page layouts for Account, Contract, Opportunity, and Product objects with recommended fields and configurations.
- CPQ Account Layout
- CPQ Contract Layout
- CPQ Opportunity Layout
- CPQ Product Layout
- Salesforce CPQ has a set of pre-packaged page layouts for Account, Contract, Opportunity, and Product objects with recommended fields and configurations.